인프런 김영한님의 스프링 강의이며, 2섹션 - 서블릿(Servlet)를 정리한다.
실습형 교육으로 자세한 설명이 궁금하면 수강을 권장한다.
스프링 MVC 1편 - 백엔드 웹 개발 핵심 기술 - 인프런 | 강의
웹 애플리케이션을 개발할 때 필요한 모든 웹 기술을 기초부터 이해하고, 완성할 수 있습니다. 스프링 MVC의 핵심 원리와 구조를 이해하고, 더 깊이있는 백엔드 개발자로 성장할 수 있습니다., 원
www.inflearn.com
스프링 부트 서블릿 환경 구성
@ServletComponentScan를 main메서드가 있는 클래스에 붙이면 된다.
@ServletComponentScan // 서블릿 자동 등록
@SpringBootApplication
public class ServletApplication {
    public static void main(String[] args) {...}
}
@WebServlet를 이용하여 서블릿 코드를 만든다.
- name : 서블릿 이름
- urlPatterns: URL 매핑
@WebServlet(name = "helloServlet", urlPatterns = "/hello")
public class HelloServlet extends HttpServlet {

    @Override
    protected void service(HttpServletRequest req, HttpServletResponse resp) throws ServletException, IOException {
        String username = req.getParameter("username");
        System.out.println("username = " + username);

        resp.setContentType("text/plain");
        resp.setCharacterEncoding("utf-8");
        resp.getWriter().write("hello " + username);
    }
}
* 주의점 : name, urlPatterns 이 중복되면 컴파일 에러 발생함. 위의 HelloServlet을 복붙하고 클래스명만 바꾸고 실행하면 아래와 같이 뜬다.
***************************
APPLICATION FAILED TO START
***************************

Description:

The bean 'helloServlet' could not be registered. A bean with that name has already been defined and overriding is disabled.
크롬을 열고 http://localhost:8080/hello?username=김d 입력 후 실행하자
크롬의 개발자도구로 HTTP 요청과 응답 메시지를 확인할 수 있다.

매번 반복해야하나?
매번 개발자도구로 HTTP 메시지를 확인할 수 없는 법, 옵션을 이용하여 편리하게 확인하는 방법도 있다. (개발할 때만 적용할 것)

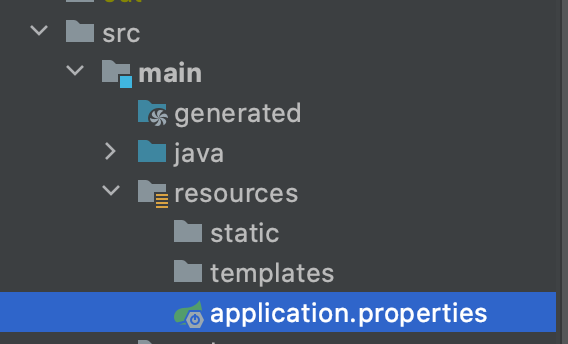
src > main > resources > application.properties 파일을 열고 옵션 입력하고 재시작한다.
logging.level.org.apache.coyote.http11=debug주소를 다시 입력하고 실행하면 인텔리제이 콘솔에 HTTP 메시지가 찍히기 시작한다.
2021-06-25 18:34:51.736 DEBUG 9485 --- [nio-8080-exec-2] o.a.coyote.http11.Http11InputBuffer      : Before fill(): parsingHeader: [true], parsingRequestLine: [true], parsingRequestLinePhase: [0], parsingRequestLineStart: [0], byteBuffer.position(): [0], byteBuffer.limit(): [0], end: [686]
2021-06-25 18:34:51.737 DEBUG 9485 --- [nio-8080-exec-2] o.a.coyote.http11.Http11InputBuffer      : Received []
2021-06-25 18:34:51.737 DEBUG 9485 --- [nio-8080-exec-2] o.apache.coyote.http11.Http11Processor   : Socket: [org.apache.tomcat.util.net.NioEndpoint$NioSocketWrapper@3e3796e1:org.apache.tomcat.util.net.NioChannel@7896bd5c:java.nio.channels.SocketChannel[connected local=/0:0:0:0:0:0:0:1:8080 remote=/0:0:0:0:0:0:0:1:61758]], Status in: [OPEN_READ], State out: [OPEN]
2021-06-25 18:34:58.098 DEBUG 9485 --- [nio-8080-exec-3] o.a.coyote.http11.Http11InputBuffer      : Before fill(): parsingHeader: [true], parsingRequestLine: [true], parsingRequestLinePhase: [0], parsingRequestLineStart: [0], byteBuffer.position(): [0], byteBuffer.limit(): [0], end: [686]
2021-06-25 18:34:58.098 DEBUG 9485 --- [nio-8080-exec-3] o.a.coyote.http11.Http11InputBuffer      : Received [GET /hello?username=%EA%B9%80d HTTP/1.1
Host: localhost:8080
Connection: keep-alive
sec-ch-ua: " Not;A Brand";v="99", "Google Chrome";v="91", "Chromium";v="91"
sec-ch-ua-mobile: ?0
Upgrade-Insecure-Requests: 1
User-Agent: Mozilla/5.0 (Macintosh; Intel Mac OS X 10_15_7) AppleWebKit/537.36 (KHTML, like Gecko) Chrome/91.0.4472.106 Safari/537.36
Accept: text/html,application/xhtml+xml,application/xml;q=0.9,image/avif,image/webp,image/apng,*/*;q=0.8,application/signed-exchange;v=b3;q=0.9
Sec-Fetch-Site: none
Sec-Fetch-Mode: navigate
Sec-Fetch-User: ?1
Sec-Fetch-Dest: document
Accept-Encoding: gzip, deflate, br
Accept-Language: ko-KR,ko;q=0.9

]
서블릿 컨테이너 동작 방식
내장 톰캣 서버 생성

웹 애플리케이션 서버의 요청 응답 구조

* 참고 : HTTP 응답에서 Content-Length는 웹 애플리케이션 서버가 자동으로 생성해준다.
HttpServletRequest - 개요
역할
- 서블릿은 HTTP 요청 메시지를 파싱하고 그 결과를 HttpServletRequest 객체로 제공한다.
HTTP 요청 메시지
POST /save HTTP/1.1
Host: localhost:8080
Content-Type: application/x-www-form-urlencoded

username=kim&age=20
- 요청 메시지 처음을 START LINE 이라고 한다.
- HTTP 메소드 : POST
- URL : /save
- 쿼리스트링
- 스키마, 프로토콜 : HTTP/1.1
- 헤더
- 헤더 : Host, Content-Type
- 바디
- form 파라미터 형식 조회
- message body 데이터 직접 조회
HttpServletRequest의 부가적인 기능들
1. 임시 저장소 기능 : 사용자의 요청이 들어오고 끝날 때까지의 생명주기를 이용하여 임시 저장소 기능 역할도 갖는다.
- 저장 : request.setAttribute(name, value)
- 조회 : request.getAttribute(name)
2. 세션 관리 기능
- request.getSession(create:true);
*중요*
HttpServletRequest, HttpServletResponse 중요한 점은 HTTP 요청 & 응답 메시지를 도와주는 객체로 이 기능에 대해 깊이 이해하려면 HTTP 스펙이 제공하는 요청, 응답 메시지 자체를 이해해야 한다.
HttpServletRequest - 기본 사용법
HttpServletRequest 제공하는 메서드들과 사용 결과다.
1. Start Line
request.getMethod() // GET
request.getProtocol() // HTTP/1.1
request.getScheme() // http
request.getRequestURL()); // http://localhost:8080/request-header
request.getRequestURI()); // /request-test
request.getQueryString()); // username=hi
request.isSecure()); //https 사용 유무
2. Headers
// 옛날에 헤더네임 가져오던 방식
Enumeration<String> headerNames = request.getHeaderNames();
while (headerNames.hasMoreElements()) {
    String headerName = headerNames.nextElement();
    System.out.println(headerName + ": " + request.getHeader(headerName));
}

// 결과물
host:localhost:8080
connection:keep-alive
sec-ch-ua:" Not;A Brand";v="99", "Google Chrome";v="91", "Chromium";v="91"
sec-ch-ua-mobile:?0
upgrade-insecure-requests:1
user-agent:Mozilla/5.0 (Macintosh; Intel Mac OS X 10_15_7) AppleWebKit/537.36 (KHTML, like Gecko) Chrome/91.0.4472.106 Safari/537.36
accept:text/html,application/xhtml+xml,application/xml;q=0.9,image/avif,image/webp,image/apng,*/*;q=0.8,application/signed-exchange;v=b3;q=0.9
sec-fetch-site:none
sec-fetch-mode:navigate
sec-fetch-user:?1
sec-fetch-dest:document
accept-encoding:gzip, deflate, br
accept-language:ko-KR,ko;q=0.9
3. Header 편리한 조회
[Host 편의 조회]
request.getServerName() // Host 헤더, localhost
request.getServerPort() // Host 헤더, 8080

[Accept-Language 편의 조회]
request.getLocales().asIterator()
                .forEachRemaining(locale -> System.out.println("locale = " + locale));
request.getLocale()

[결과물]
locale = ko_KR
locale = ko
request.getLocale() = ko_KR

[Cookie 편의 조회 - 쿠키가 저장되어있으면 출력]
if (request.getCookies() != null) {
    for (Cookie cookie : request.getCookies()) {
        System.out.println(cookie.getName() + ": " + cookie.getValue());
    }
}

[Content 편의 조회]
request.getContentType() = null
request.getContentLength() = -1
request.getCharacterEncoding() = UTF-8
4. 기타 정보
[Remote 정보]
request.getRemoteHost() = 0:0:0:0:0:0:0:1
request.getRemoteAddr() = 0:0:0:0:0:0:0:1
request.getRemotePort() = 59160

[Local 정보]
request.getLocalName() = localhost
request.getLocalAddr() = 0:0:0:0:0:0:0:1
request.getLocalPort() = 8080
'교육 및 인강 > 스프링 MVC 1편 - 백엔드 웹 개발 핵심 기술' 카테고리의 다른 글
| 서블릿(Servlet) - HttpservletResponse 기본 사용법, HTTP 응답 데이터 단순 텍스트 & HTML & API JSON (0) | 2021.06.28 |
|---|---|
| 서블릿(Servlet) - API 메시지 바디 : 단순 텍스트, JSON (0) | 2021.06.28 |
| 서블릿(Servlet) - HTTP 요청 데이터 : 개요, GET 쿼리 파라미터, POST HTML Form (0) | 2021.06.27 |
| 웹 애플리케이션 이해 - HTML, HTTP API, CSR, SSR, 자바 백엔드 웹 기술 역사 (0) | 2021.06.25 |
| 웹 애플리케이션 이해 - WS, WAS, Servlet, 멀티 쓰레드 (0) | 2021.06.25 |
